Contact Lists: Create a Targeted List of Contacts
Why Create Contact Lists?
Contact lists allow you to create groups of users for tailored communications. With Contact Lists, you can create targeted, relevant messaging that resonates with your individual customers at scale. With a single message, you can also guide entire groups of your customers who have specific products, order statuses, and service areas toward taking the specific actions you need these customers to take in order to move your company forward.
Tip
Contact Lists can be used to communicate to a specific zone or a selection of zones. You can inform contacts in your In-Service Zones about a newly available upgrade or communicate with contacts in a Pre-Registration zone(s) about steps that can or will be taken to bring service to their area.
How to Build a Contact List:
Step 1: Create a New List
-
Click the Engagement link located in the left-hand rail of your Admin Dashboard.
-
Click the Contact List link located within the Engagement drop-down menu.
-
On the following Contact Lists page click the green New List button in the upper right-hand corner of your Contact Lists page
-
You can create your list on the following page
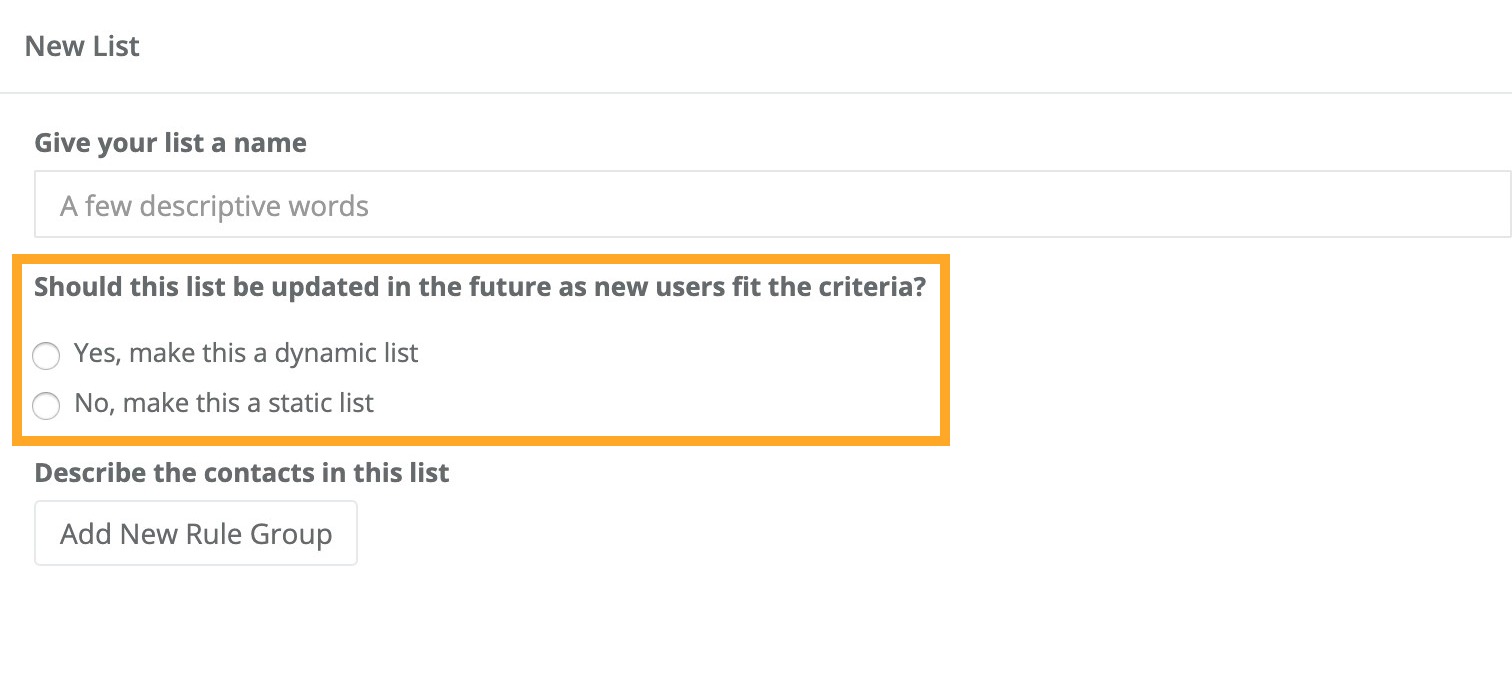
Step 2: Describe Your List’s Purpose
Now, it’s time to give your list a title that describes the customers it's targeting and choose whether you’d like to make this list a Static List or a Dynamic List.
-
Static list: a snapshot in time of current addresses.
Once this list is created it does not change nor update as the addresses in your database expand or update on the list.
-
Dynamic list: a real-time view of current addresses.
These lists are constantly adding and removing addresses as soon as an address' details meet or do not meet all of the criteria/rules applied to your list.
Step 3: Target Your Customers
The next step is to define the customers who you’d like to target by creating the “rules” that define who can become a part of this list.
Rules are helpful in hyper-targeting a specific list of subscribers to receive your messaging.

How to Create Your Rules
Conflicting Rules Create Unusable Contact List
If you create a contact list with conflicting rules you will see the text "[number number]" or "[Object Object]" display in the Contacts Column on your Contact List page in your Admin Dashboard. When you see this text the associated contact list is unusable.
-
Click the “Add New Rule Group” Button.
-
Open the drop-down menu on the left and select a specific attribute that describes the customers you’d like to have on the list.
-
In the drop-down menu on the right, select or type the exact attribute that you’d like every customer on this list to have.
-
Now get as specific with your rules as necessary: continue to click Add Rule to add the customer attributes that refine your list to include only the specific customer you’d like to communicate with.
Note
You’ll see the number of contacts on your list inside the green button.
Example
Inside Zone(s) Equals “West Rome” will immediately give you a list of all your customers inside the “West Rome” Zone.
Example
Adding the rule “Has Order in Market” Equals “Residential” will immediately show you a list of all your Residential subscribers that have an order in the West Rome Zone.
Don’t Forget to Save your List! Scroll to the bottom of the page and click the green Save List button.