Admin User Access: Inviting New Users & Setting Admin Roles
What are Admin Roles?
Admin Roles give you the ability to expand or restrict each of your teammates access to your platform features.
You can assign your teammates a single role or grant them a combination of roles to provide each unique user with access to all areas of the site necessary for them to accomplish all of their day-to-day responsibilities. It is a good idea to assign the user role that best fits the area of responsibility and avoid assigning roles for areas that do not apply to user knowledge or responsibility.
Tip
All registrants are users of your CrowdFiber site. To protect your site and your organization, do not assign additional roles to customers. Admin Roles should be limited to your internal teammates and contracted vendors.
Admin Roles Defined
Do not grant any Admin User all Admin Roles. Providing users with all Admin Roles will create conflicts that restrict access to your CrowdFiber Admin Dashboard.
Note
Assigning additional roles beyond the two Admin Roles above will result in restricted access to CrowdFiber.
To provide an Admin User with full access to your CrowdFiber site, only grant the admin user the following two Admin Roles:
-
Site Admin
-
Frontend Editor
Managers & Team Leaders
| Admin Roles | Site Admin | Content Admin | Marketing Admin | Product Admin | User Admin | View Zones | Zone Admin | View Secure Answers |
| Dashboard | X | X | X | X | X | X | X | - |
| Map | X | X | X | X | X | X | X | - |
| Tasks | X | - | X | - | - | - | X | - |
| Addresses | X | - | X | - | - | - | X | - |
| Locations | X | - | X | - | - | - | X | - |
| Contacts | X | - | X | - | - | - | X | - |
| Sales | X | - | X | - | - | - | X | View Secure Survey Responses Only |
| Products | X | - | X | X | - | - | - | - |
| Zones | X | - | - | - | - | View only | X | - |
| Documents | X | - | - | - | - | - | - | - |
| Terms | X | - | - | - | - | - | - | - |
| Engagement | X | - | X | - | - | - | - | - |
| Users | X | - | X | - | X | - | X | - |
| Settings | X | - | - | - | - | - | - | - |
| Integrations | X | - | - | - | - | - | - | - |
| Language | X | - | - | - | - | - | - | - |
| Audit Log | X | - | - | - | - | - | - | - |
Sales & Customer Support
| Admin Roles | Customer Admin | Lead Admin | Sales | Sales Admin | Subscription Admin | Check Address Only Admin | Frontend Editor | Kiosk |
| Dashboard | X | X | X | X | X | X | No User Access | No User Access |
| Map | X | X | X | X | X | - | - | - |
| Tasks | X | - | X | X | - | - | - | - |
| Addresses | X | X | X | X | - | - | - | - |
| Locations | X | X | X | X | - | - | - | - |
| Contacts | X | X | X | X | - | - | - | - |
| Sales | X | Leads only | X | X | - | - | - | - |
| Subscriptions | - | - | - | - | X | - | - | - |
| Products | - | - | - | X | - | - | - | - |
| Zones | - | - | - | X | - | - | - | - |
| Documents | X | - | - | X | - | - | - | - |
| Terms | X | - | X | X | - | - | - | - |
| Engagement | X | - | - | - | - | - | - | - |
| Users | X | X | - | X | - | - | - | - |
| Settings | - | - | - | - | - | - | - | - |
| Integrations | - | - | - | - | - | - | - | - |
| Language | - | - | - | - | - | - | - | - |
| Audit Log | - | - | - | - | - | - | - | - |
- Sales & Customer Support Users
- Every Admin User, regardless of Admin Roles, must be given Assisted order mode permissions to complete orders on behalf of your customers.
- CrowdFiber Content Editors
- Every Admin User, regardless of Admin Roles, must be assigned the Frontend Editor role to edit content throughout your CrowdFiber frontend and registration processes.
- Developers
- The Developer Access role will grant a person access to your API Docs.
- Once this role has been assigned, you will need to provide the link to your API docs to the new user.
Info
- To access the link to your API Docs:
1) Click the Integrations link located in the left-hand rail of your Admin Dashboard.
2) Select API Docs from the Integrations drop-down menu.
How to Add a New Admin User
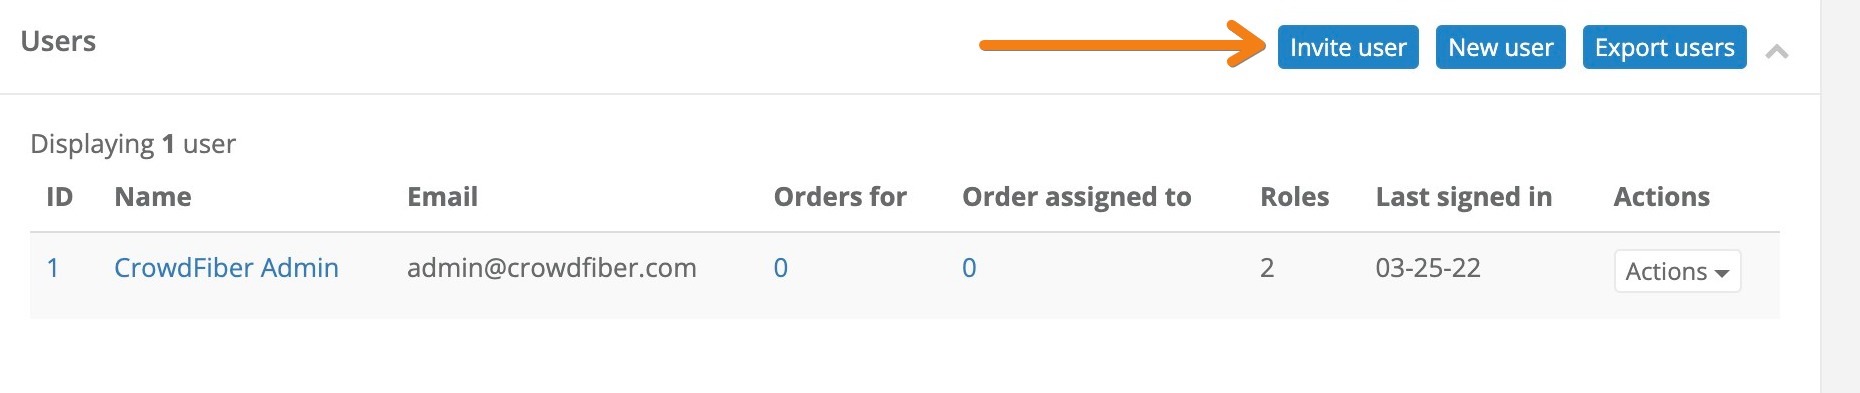
- Select the Users link located in the left-hand rail of your Admin Dashboard.
- Click the blue Invite User button located in the upper right-hand corner of the User index.
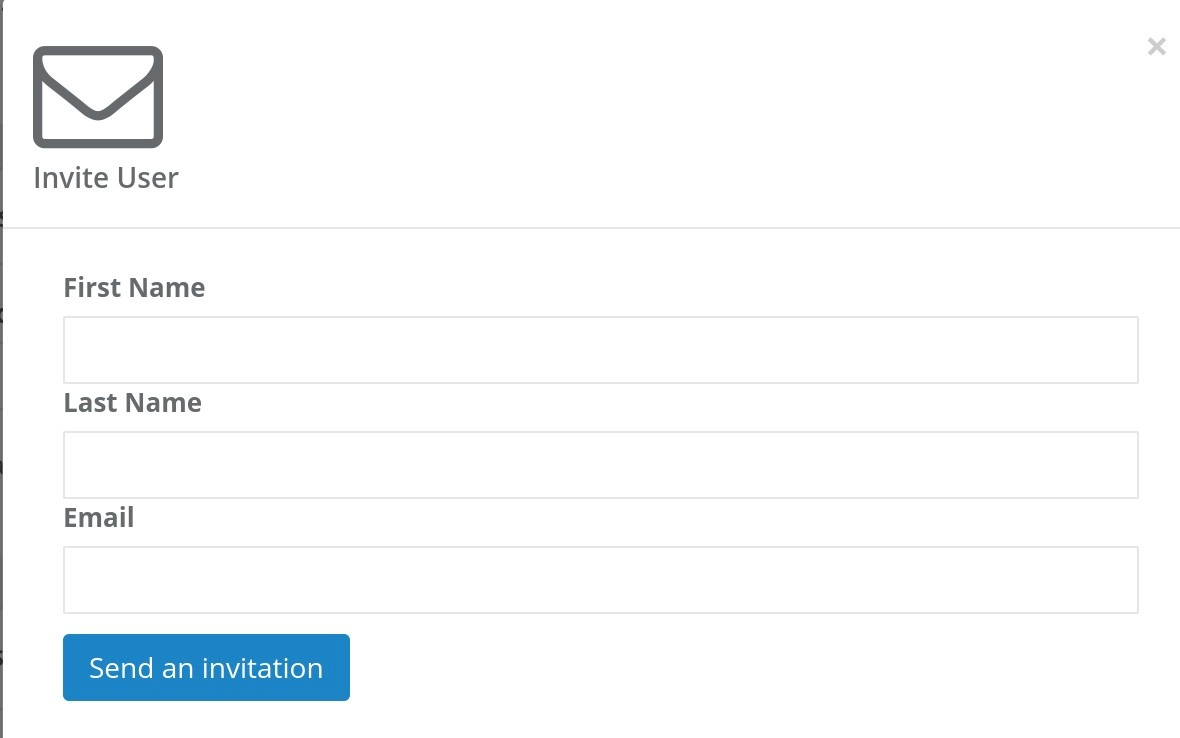
- In the following Invite User popup, enter the new user's first name, last name, and email address into the applicable fields.
- Then, click the blue Send an Invitation button.
The user will immediately be sent an email with a link to create a password and sign in to your CrowdFiber site.
How to Assign/Edit Admin Roles
1. Click the Users link located in the left-hand rail of your Admin Dashboard
2. On the following Users page, use the filters at the top of the page to locate the user record whose role(s) you'd like to adjust.
3. Select Edit from the Actions button drop-down menu.

4. On the following Edit user page, scroll down to Site Admin Role columns seen in the User Access section.
5. Add or subtract Site Admin Roles:
- To add Admin Roles to a user record, click the appropriate Admin Role(s) seen in the Available column.
- To remove Site Admin Roles from a user record, click the applicable Admin Role(s) seen in the Selected column.
The Admin Roles assigned to the user will always appear in the Selected Column seen on the right-hand side of the page.

6. Click the Save User button in order to apply your new Admin Roles to the user.
The new set of Admin Roles will be applied to the user record in real time.
How to Reset a User's Password
- Click the Users link located in the left-hand rail of your Admin Dashboard
- From the Users index located below the Filter section on this page, locate the row containing the user who would like to reset their password.
- In the row containing the applicable user record, click the Actions button that is located in the far right column of the User index.
-
Select Reset Password from the Actions button drop-down menu.
An email will be sent to the User with a link to reset their password
How to Disable/Deactivate a User
1. Click the Users link located in the left-hand rail of your Admin Dashboard
2. On the following Users page, use the filters at the top of the page to locate the user record that you would like to disable/deactivate.
3. From the Users index located below the Filter section on this page, locate the row containing the user who would like to reset their password.
4. In the row containing the applicable user record, click the Actions button that is located in the far right column of the User index.
5. Select Edit from the Actions button drop-down menu.
6. On the following Edit user page, remove all Admin Roles assigned to the user record.
- Scroll down to the User Access section
-
Clicking the two left-facing arrows seen in the Selected column on the right-hand side of the page.
After completing this step, confirm that no roles are visible in the Selected column.

7. In the User Access section, click the Disable user account checkbox located at the bottom of the Available column.

8. Click the Save User button in order to disable/deactivate this user record in realtime.