Payments: How to Configure & Test
Are you ready to start accepting payments?
With four easy steps, you can take payments inline with your registration process. Below is a detailed step-by-step guide that will make it easy for you to starts collecting payments.
Stripe Payment Processing Configuration
CrowdFiber uses a payment processor called Stripe for processing payments for you. CrowdFiber uses Stripe to connect you to your customers and takes no additional fees or charges above Stripe’s cost. In fact, CrowdFiber does not see or store the credit cards collected at all. You can learn more about Stripe at https://stripe.com .
Here are the steps to prepare to collect payments in CrowdFiber:
Step 1) Set Up a Stripe Account
- Create an account on Stripe at https://dashboard.stripe.com/register
- Go to your Stripe Dashboard. You should see the words Test Mode on the upper left slider.
- Go to the upper right and select Account to link a bank checking account to Stripe.
- Click on Transfers to add your checking account.
Congratulations! You have now created a Stripe account and tied your banking account number to it. It's time to move on to Step 2.
Step 2) Provide CrowdFiber with Developer Only to Your Stripe Account
1. In your Stripe Dashboard establish the following email address as a Developer Only User:
2. The CrowdFiber Support team will notify you when it is time to move to Step 3.
Step 3) Establish Your Payments Settings
From this page, you can enable payments for in-service and pre-registration backers. You can also change the payment mode from test to live. Test mode allows you to use the above test cards to make sure the system is working.
You can also collect a default amount from every backer, and enable pay by check. You will need to give an address for Pay by check.
ENABLE PAYMENTS ON CROWDFIBER
Go to Admin>Settings>Payments, select the type of payments you want to collect. Turn on payments by credit card and/or by check by selecting the box.
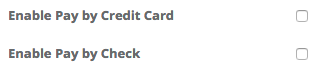
If you are enabling payment by check, add the instructions that will appear to the user after their order is complete. This may include a mailing address and instructions on how to check status.

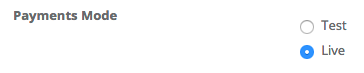
TEST/LIVE
You can put payments in the TEST mode to allow you to create test charges during configuration. This needs to be set to LIVE in order for payments to be collected from users.
SET DEFAULT AMOUNT
Add the default amount which will apply across the campaign. This amount needs to be in cents.

Example: $50 deposit = 5000 (no symbols necessary)
Collecting payment only in certain zones? Don't worry. You can override this default on each zone individually. If you only want to collect payment on a specific zone, set the default to 0.
SET BILLING DESCRIPTOR
If you are collecting payment by credit card, add the text that will be placed by the charge on the user's credit card statement and help the customer identify who a payment was made to on a particular transaction.
The name used is typically the trading name of the business rather than the legal name so that it can be easily recognized by the customer. The billing descriptor may also be made up of a soft or dynamic descriptor that includes the name of the service provided.
NOTE: Selecting a clear billing descriptor is important for a merchant to avoid a chargeback when the customer does not recognize the name on the transaction. Many service providers use Internet Deposit or Registration Fee0. to separate this charge from one that might accompany other services the customer purchases from the company.

Make sure to provide a way to easily inquire about the charge by including a phone number or website URL. ex: Service Provider Internet Deposit 800-123-4567
CONFIGURE ZONE PAYMENTS
After you've configured your global settings, you will need to enable payments on each zone. Go to Zones and click to edit any zone that will be collecting payment.
Check the box for Enable Payment -- whether the user gets prompted to pay will be based on the zone they resolve to be in.
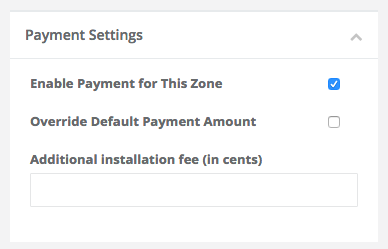
CONFIGURE ZONE CHARGES
You have many options for deposit/installation amounts.
Option A: Charge the default amount. Simply check the Enable payments and leave everything else blank.
Option B: Charge a specific amount to all orders within a zone.
Simply check Override Default Payment Amount and add the correct charge (in cents) to the box.
Option C: Add an additional amount to the default charge to orders within a zone.
Do not check the Override setting, but enter the additional amount (in cents) in the box. This fee will be ADDED to the default amount for orders within that zone.
Step 4) Test your Payment Widget
Once configured, you can test the payments process in CrowdFiber with a variety of card numbers and card types in test mode. Here are the current test cards provided by Stripe for Visa, MasterCard, American Express, Discover, Diner’s Club, and JCB.
https://stripe.com/docs/testing#cards.
| NUMBER | BRAND |
| 4242424242424242 | Visa |
| 4012888888881881 | Visa |
| 4000056655665556 | Visa (debit) |
| 5555555555554444 | Mastercard |
| 5200828282828210 | Mastercard (debit) |