Email: How to Target, Create, Preview, & Send Your Message
Step 1: Create a Contact List
CrowdFiber's email feature sends emails to targeted groups of your contacts. You can define who is included in each targeted group of contacts by creating a contact list.
Step 2: Navigate to the Email Editor
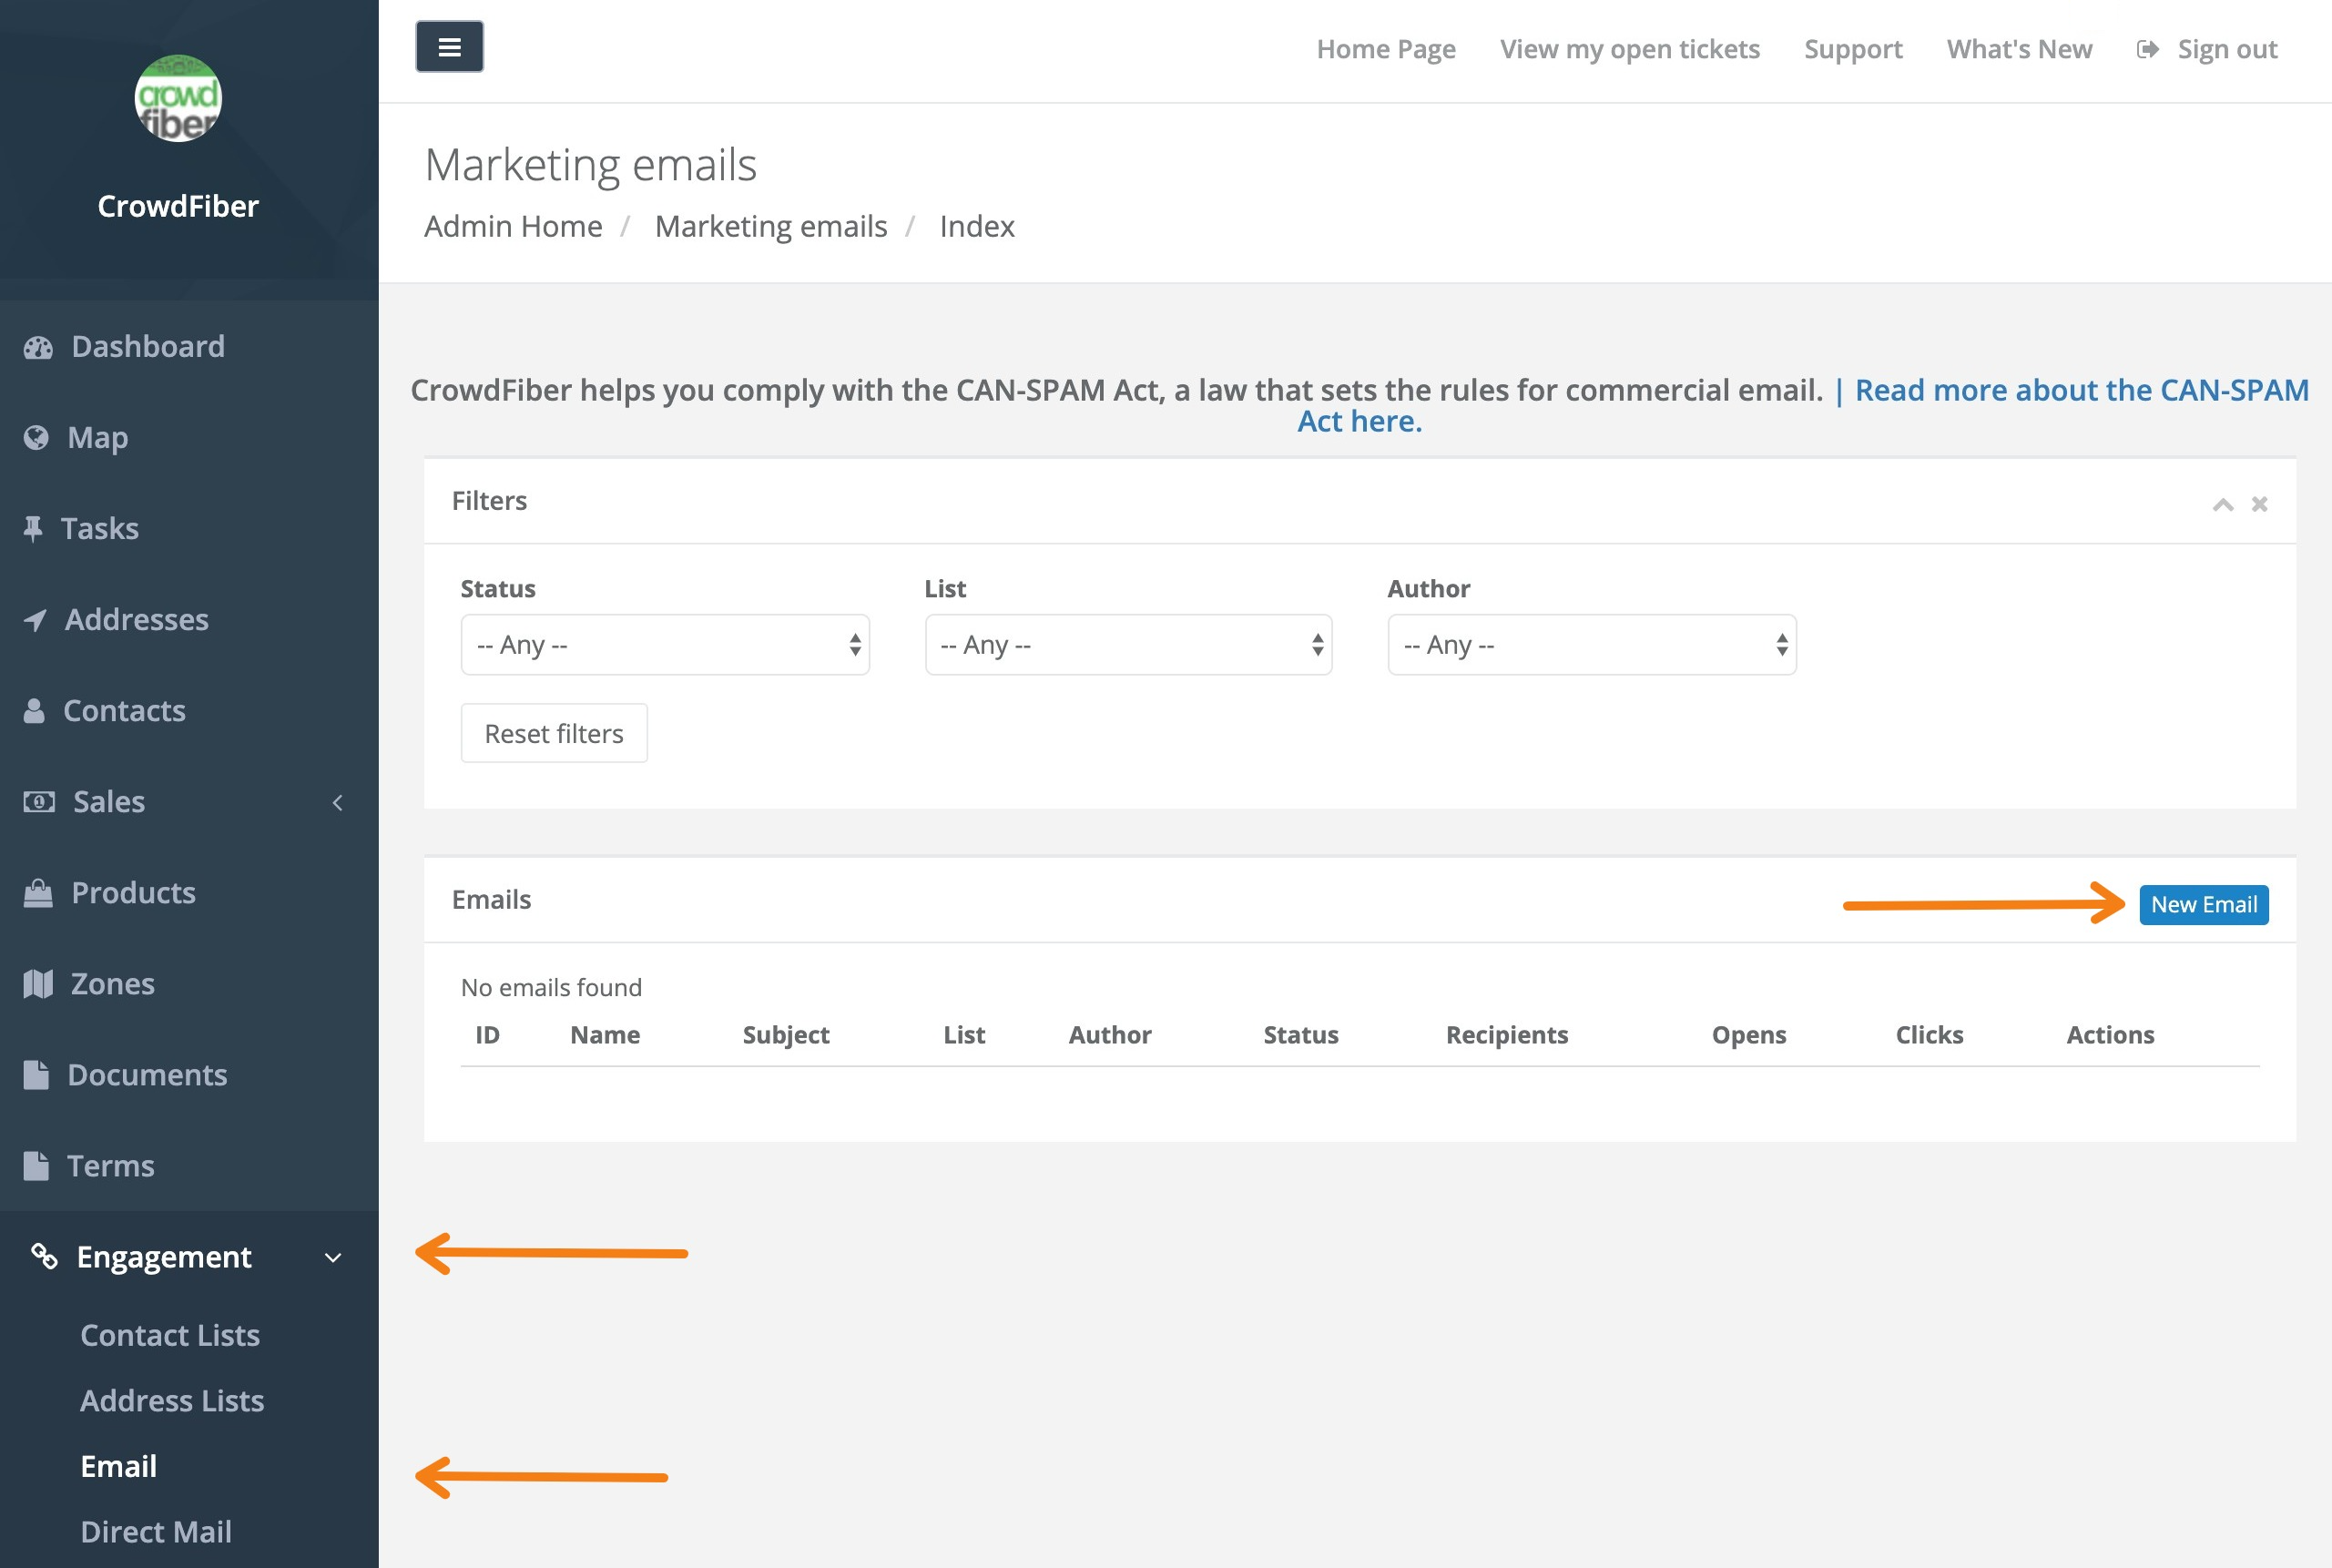
- Click the Engagement Link located in the left-hand rail of your Admin Dashboard.
- Select the email link located within the Engagement drop-down menu.
-
On the following Marketing Emails page, click the blue New Email button located in the upper located in the right-hand corner of your email index.
Step 3: Get Creative
1. Establish your Campaign Details
- Campaign Name: This is an internal name for an email campaign that will be seen when you click Engagement > Email.
-
List: This object allows you to select the contact list you will send an email too.
This drop-down menu will allow you to select the contact list that will receive this email.
- Subject Line: This is the email subject that will display in your recipients' inbox.
-
From Address: This is the name and email address that your email will display in your recipients' inbox.
To prevent emails from ending up in spam folders, always use an email from your domain.
2. Use the Email Editor to add custom text and images
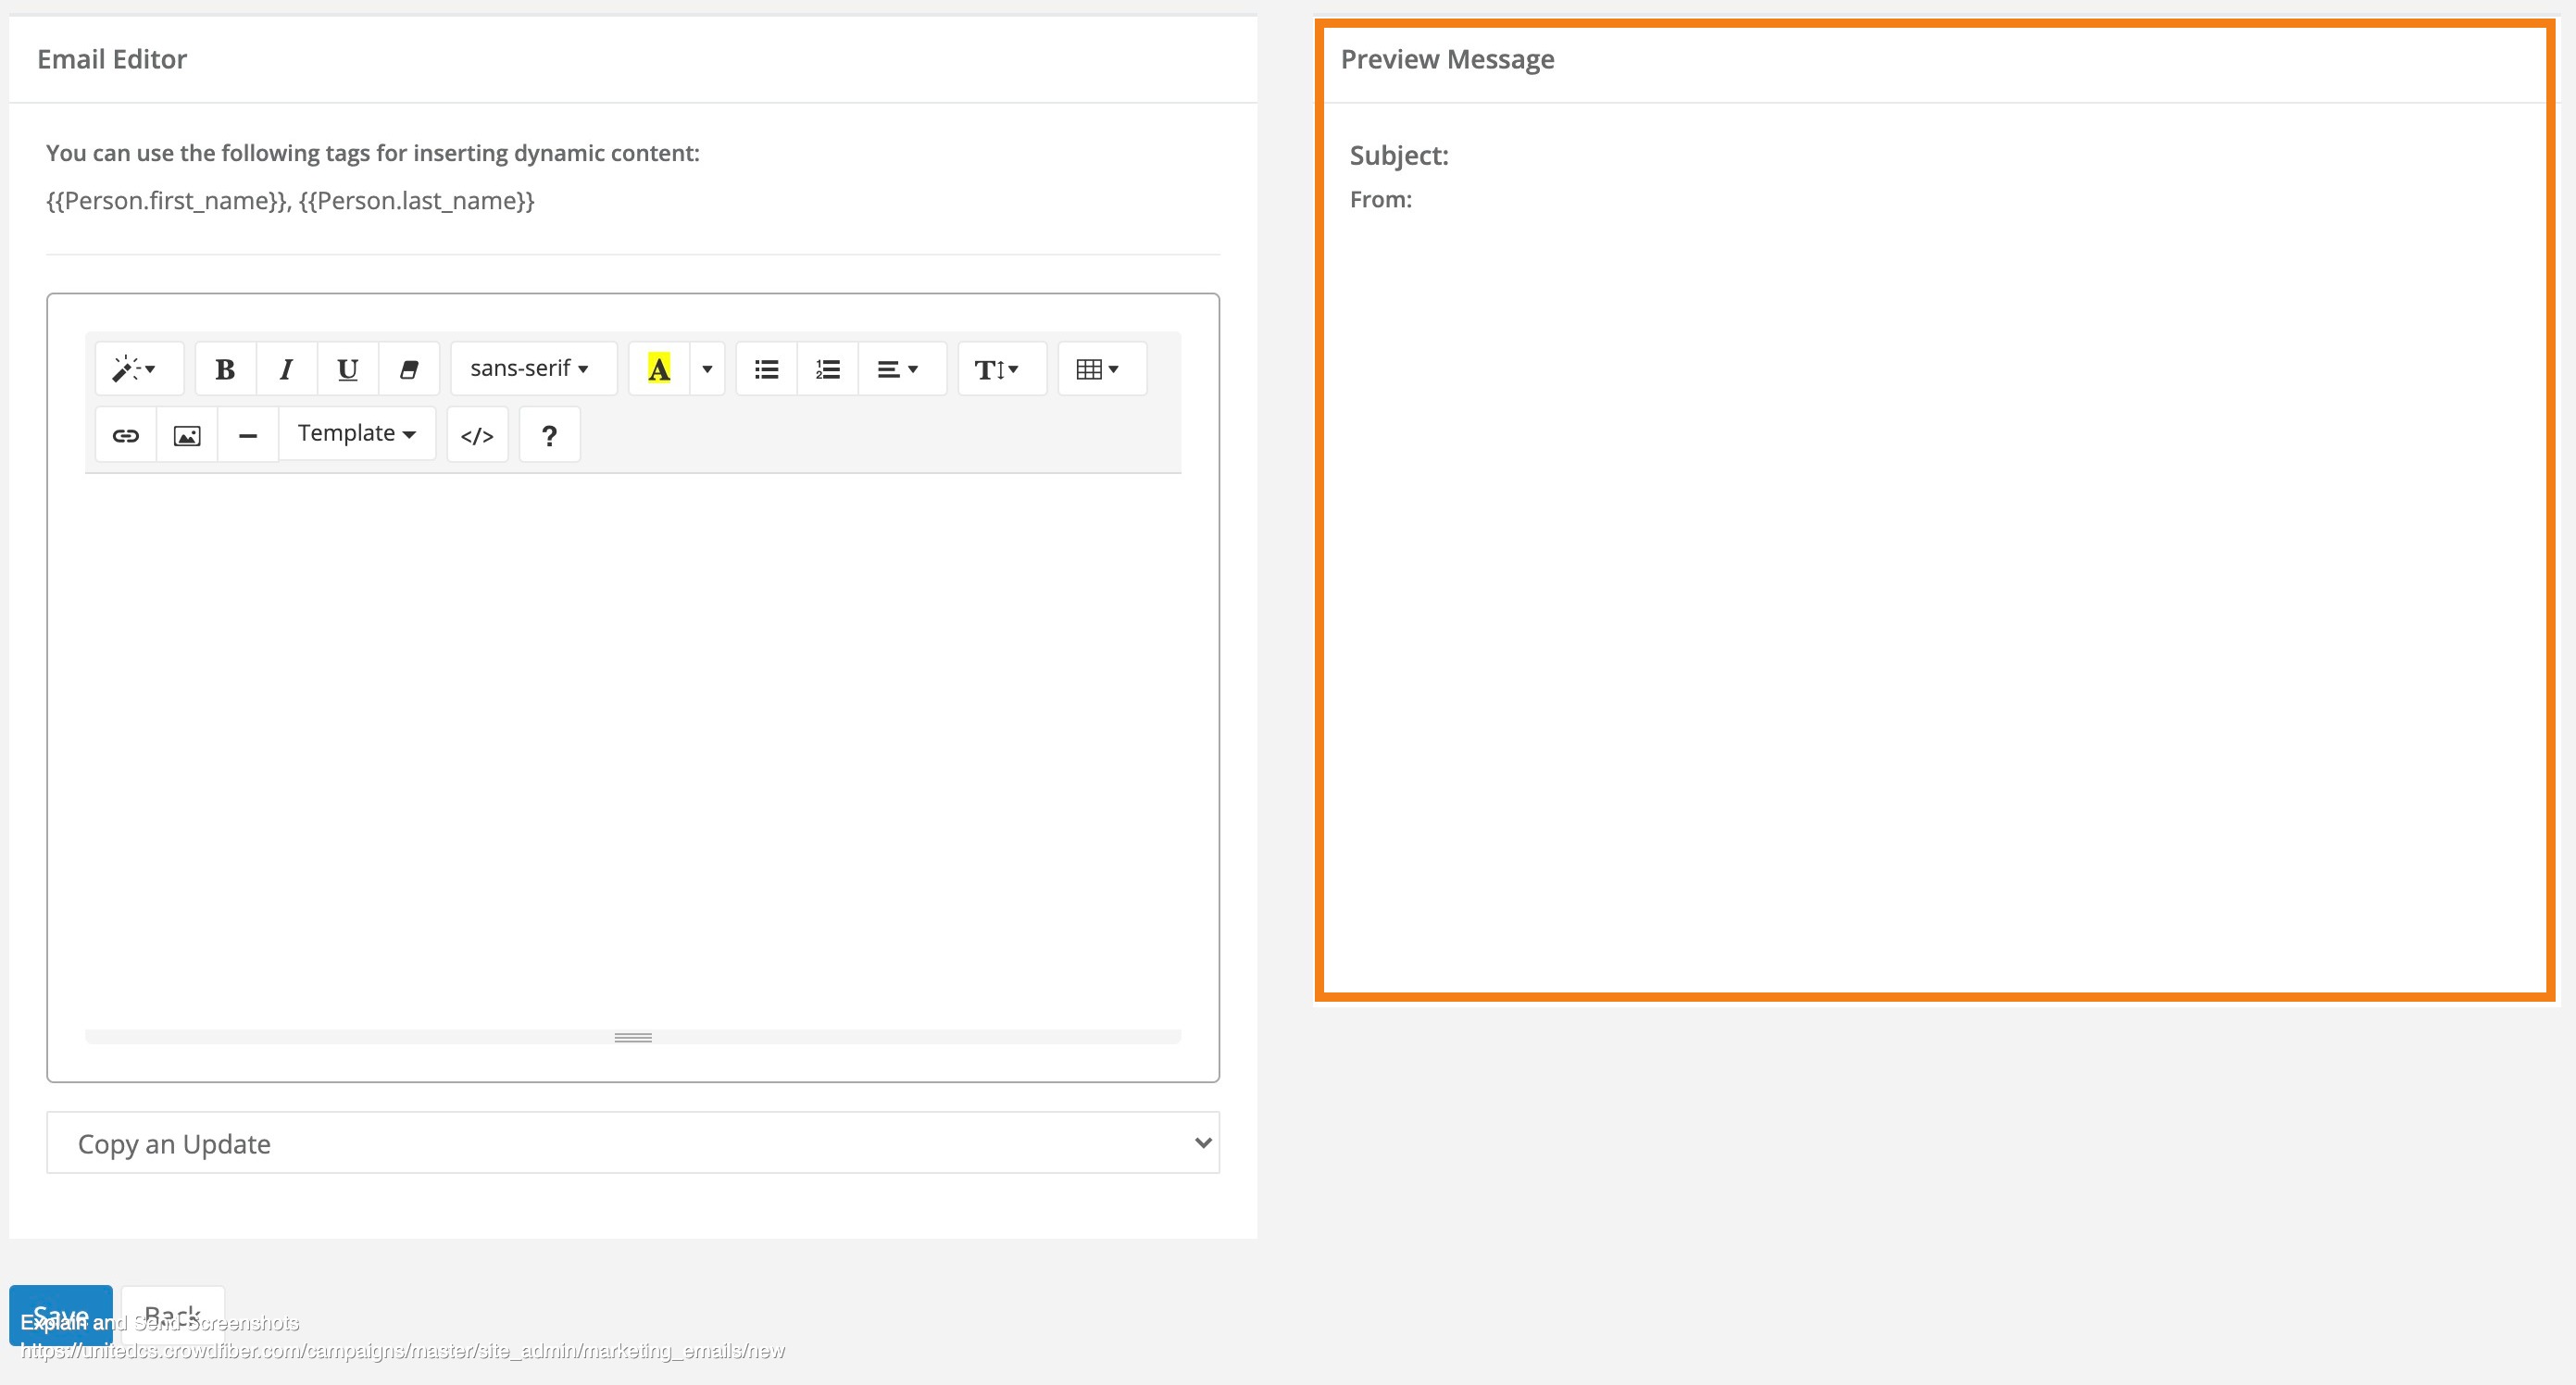
Below the Campaign Details object, you’ll see the Email Editor on the left-hand side of your screen and a real-time preview of your message on the right-hand side of your screen.
3. Add a Call to Action Button
While a Call to Action button is optional, these buttons are designed to make it easy for the recipients on your contact list to either visit the home page of your CrowdFiber site or automatically log into their CrowdFiber account to complete outstanding steps - like selecting their products or completing a follow-up survey (click here to learn more about CrowdFiber's Outstanding Steps Feature).
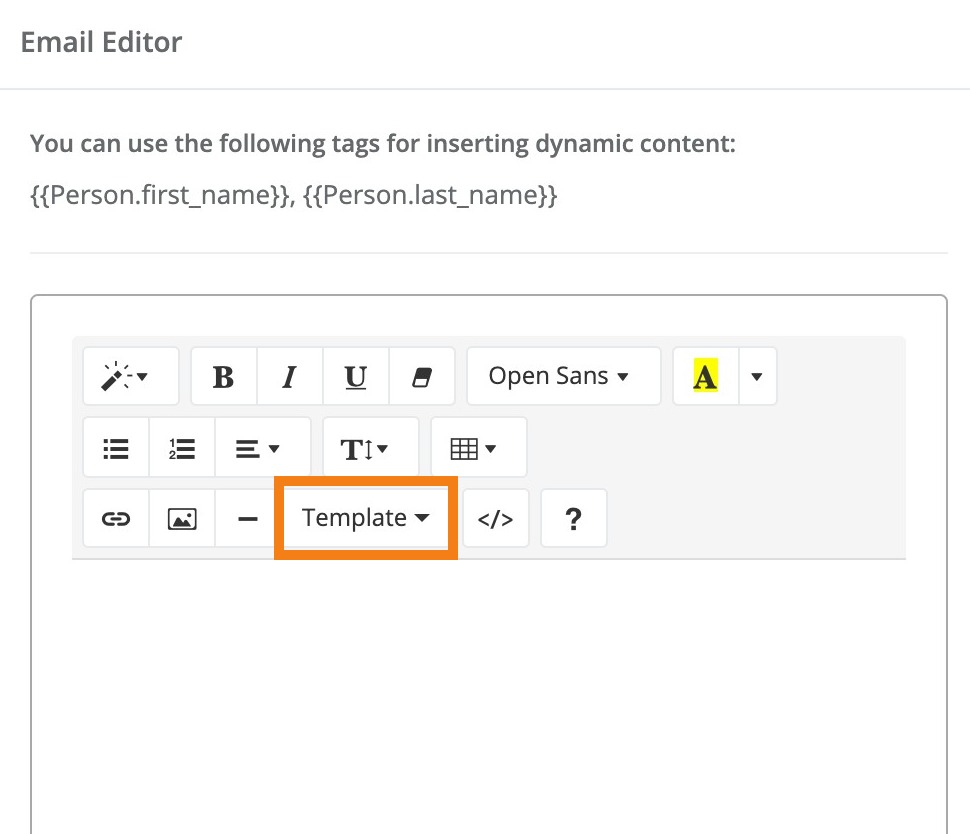
- In the Email Editor, click the Template drop-down menu.
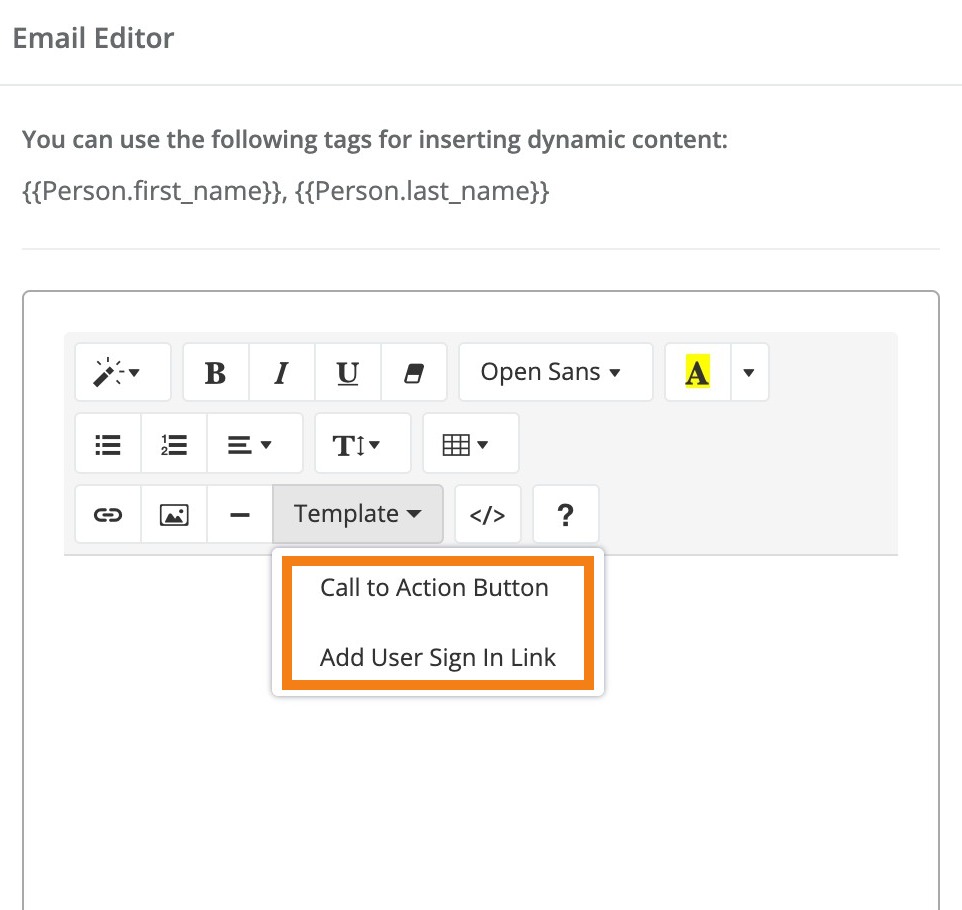
- Choose your Call to Action
From the Template drop-down menu choose the call to action that will make the most sense for the goal of your email:
- Call to Action will connect contacts directly to your CrowdFiber site's Home Page.
- Add User Sign-In Link will automatically log a contact into their CrowdFiber account and take the contact to their User Dashboard.
You can edit the text of a Call to Action button by editing the button's text in the Email Editor.
The Call to Action button does not center align in the email editor; it will automatically center align when your email arrives in an inbox.
-
Save your Email
Save your email by clicking the blue Save button located in the lower left-hand corner of your screen.
Without clicking the Save button all edits may be lost after navigating away from the Email Editor Page.
Step 4: Preview your Email
There are three ways to preview your email message:
If you are sending a preview email with a User Sign-In Link, after reviewing the three email preview options below please make sure to review the "Sending a preview with a User sign-In link" details located at the bottom of this section.
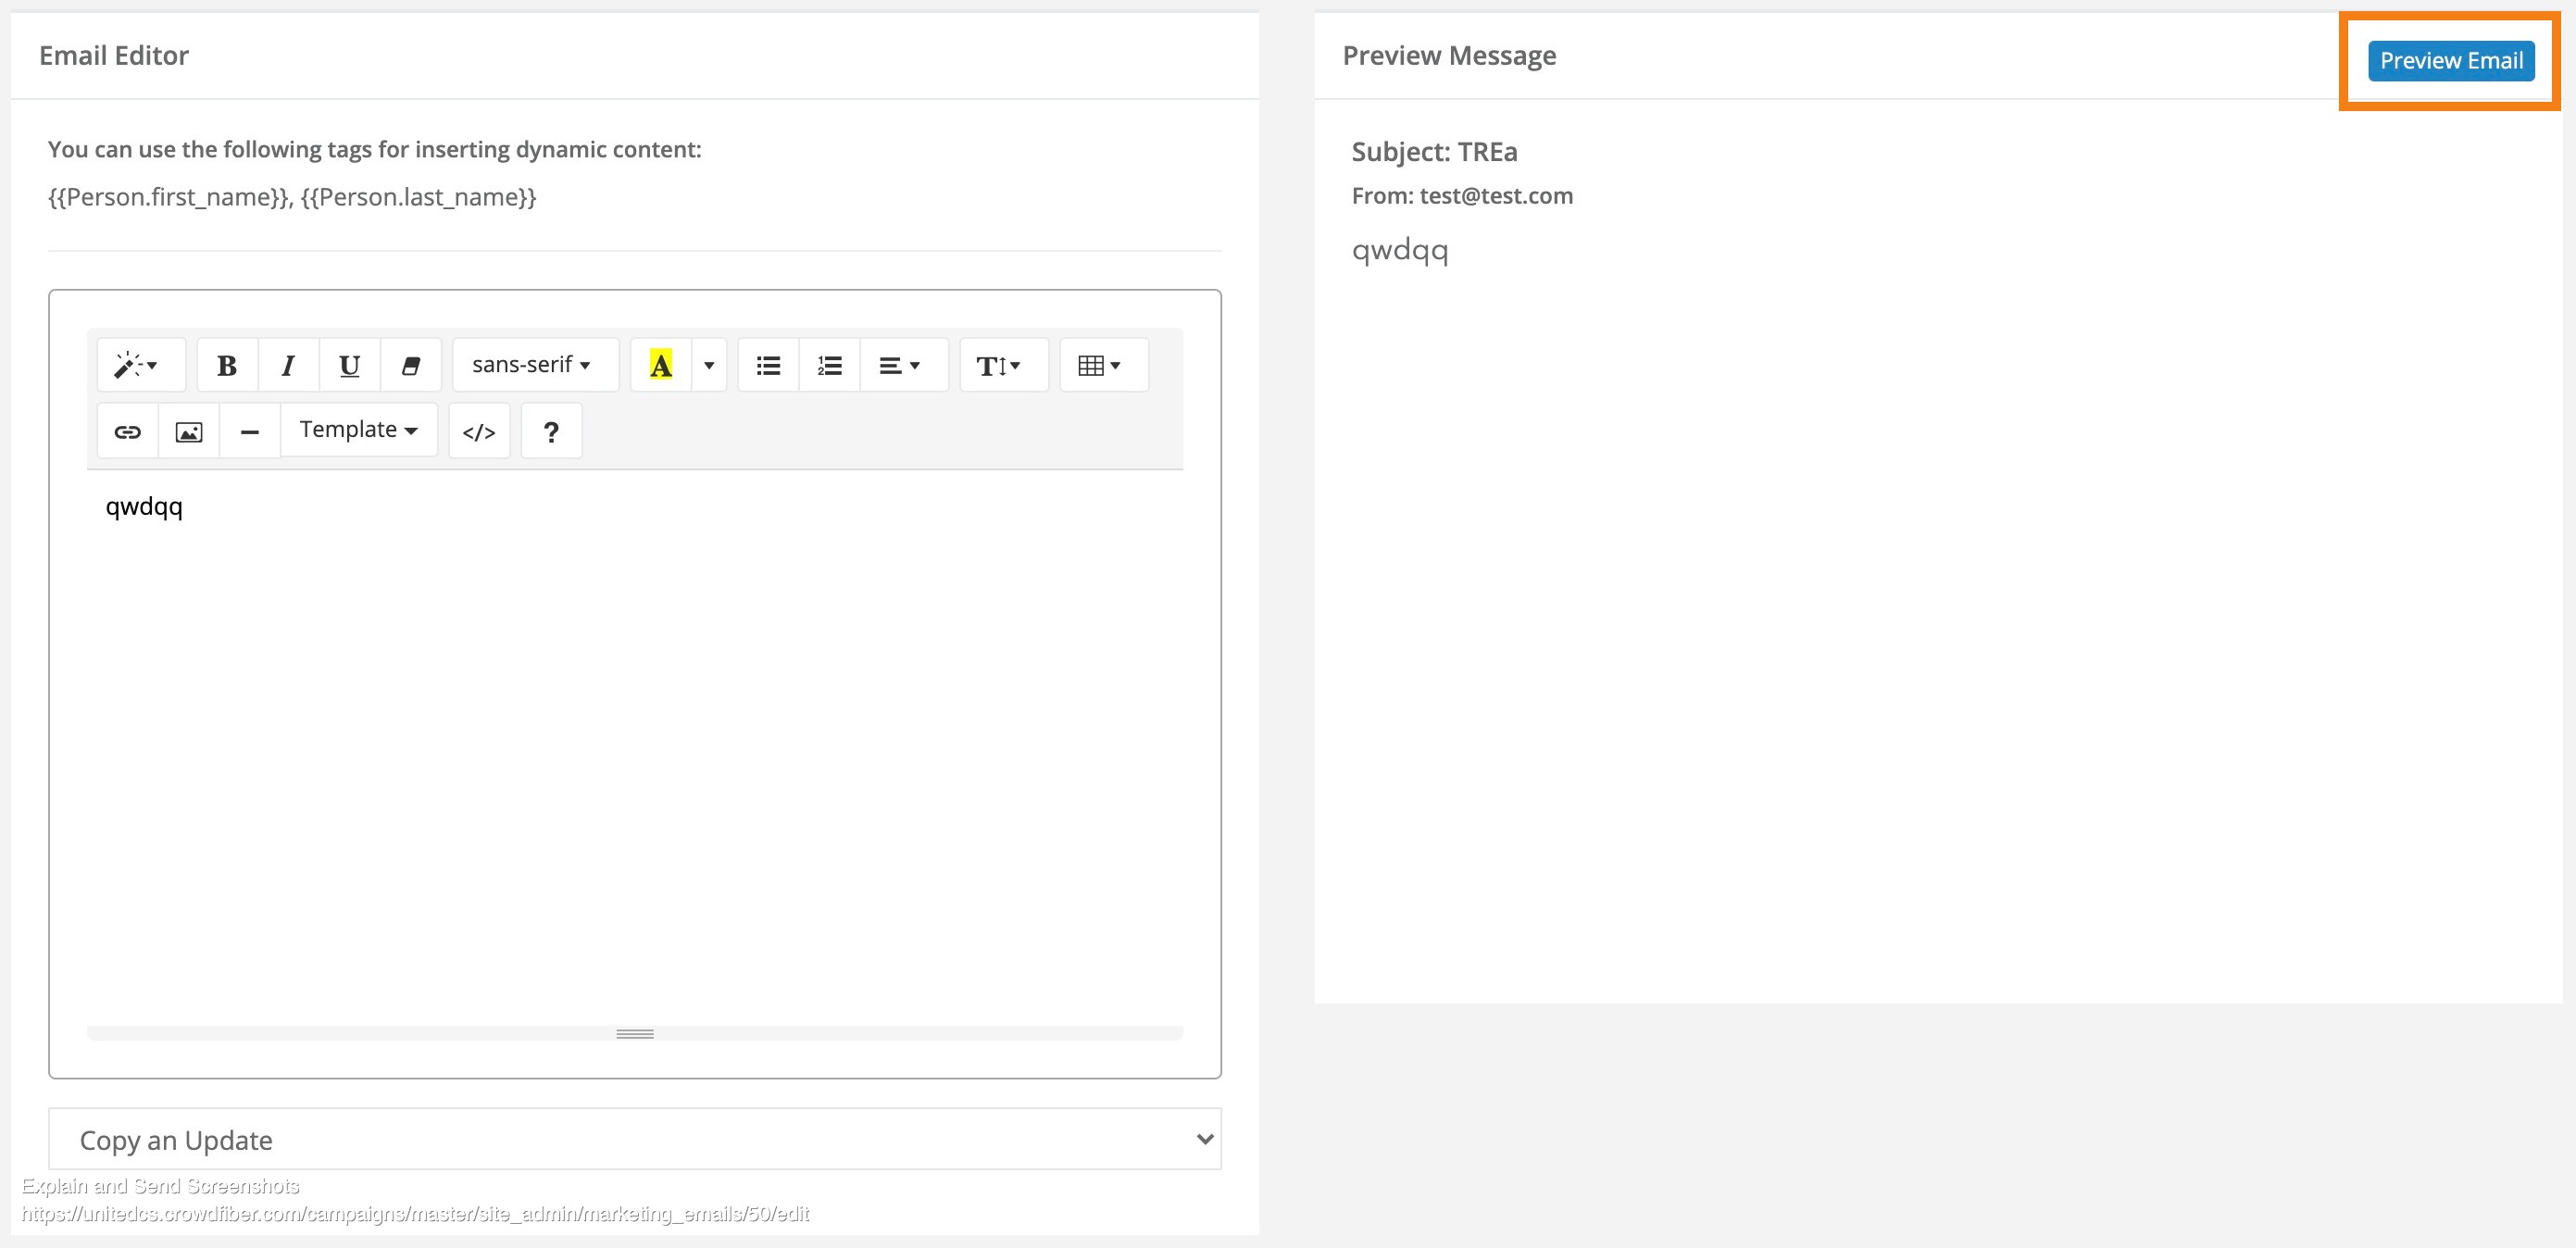
i. Preview your email in real-time
Watch a real-time preview of your message be created in the Preview Message object located to the right of the email editor.
ii. Preview your email in your web browser
After you save your email you'll automatically be taken back to the Marketing Emails page. The next time you visit this email's email editor, you'll notice a blue Preview Email button located in the upper right-hand corner of the Preview Email object. Click this button to preview your email in a new tab in your web browser (a new tab in your web browser will automatically open when the Preview Email button is clicked).
iii. Send a Test Email
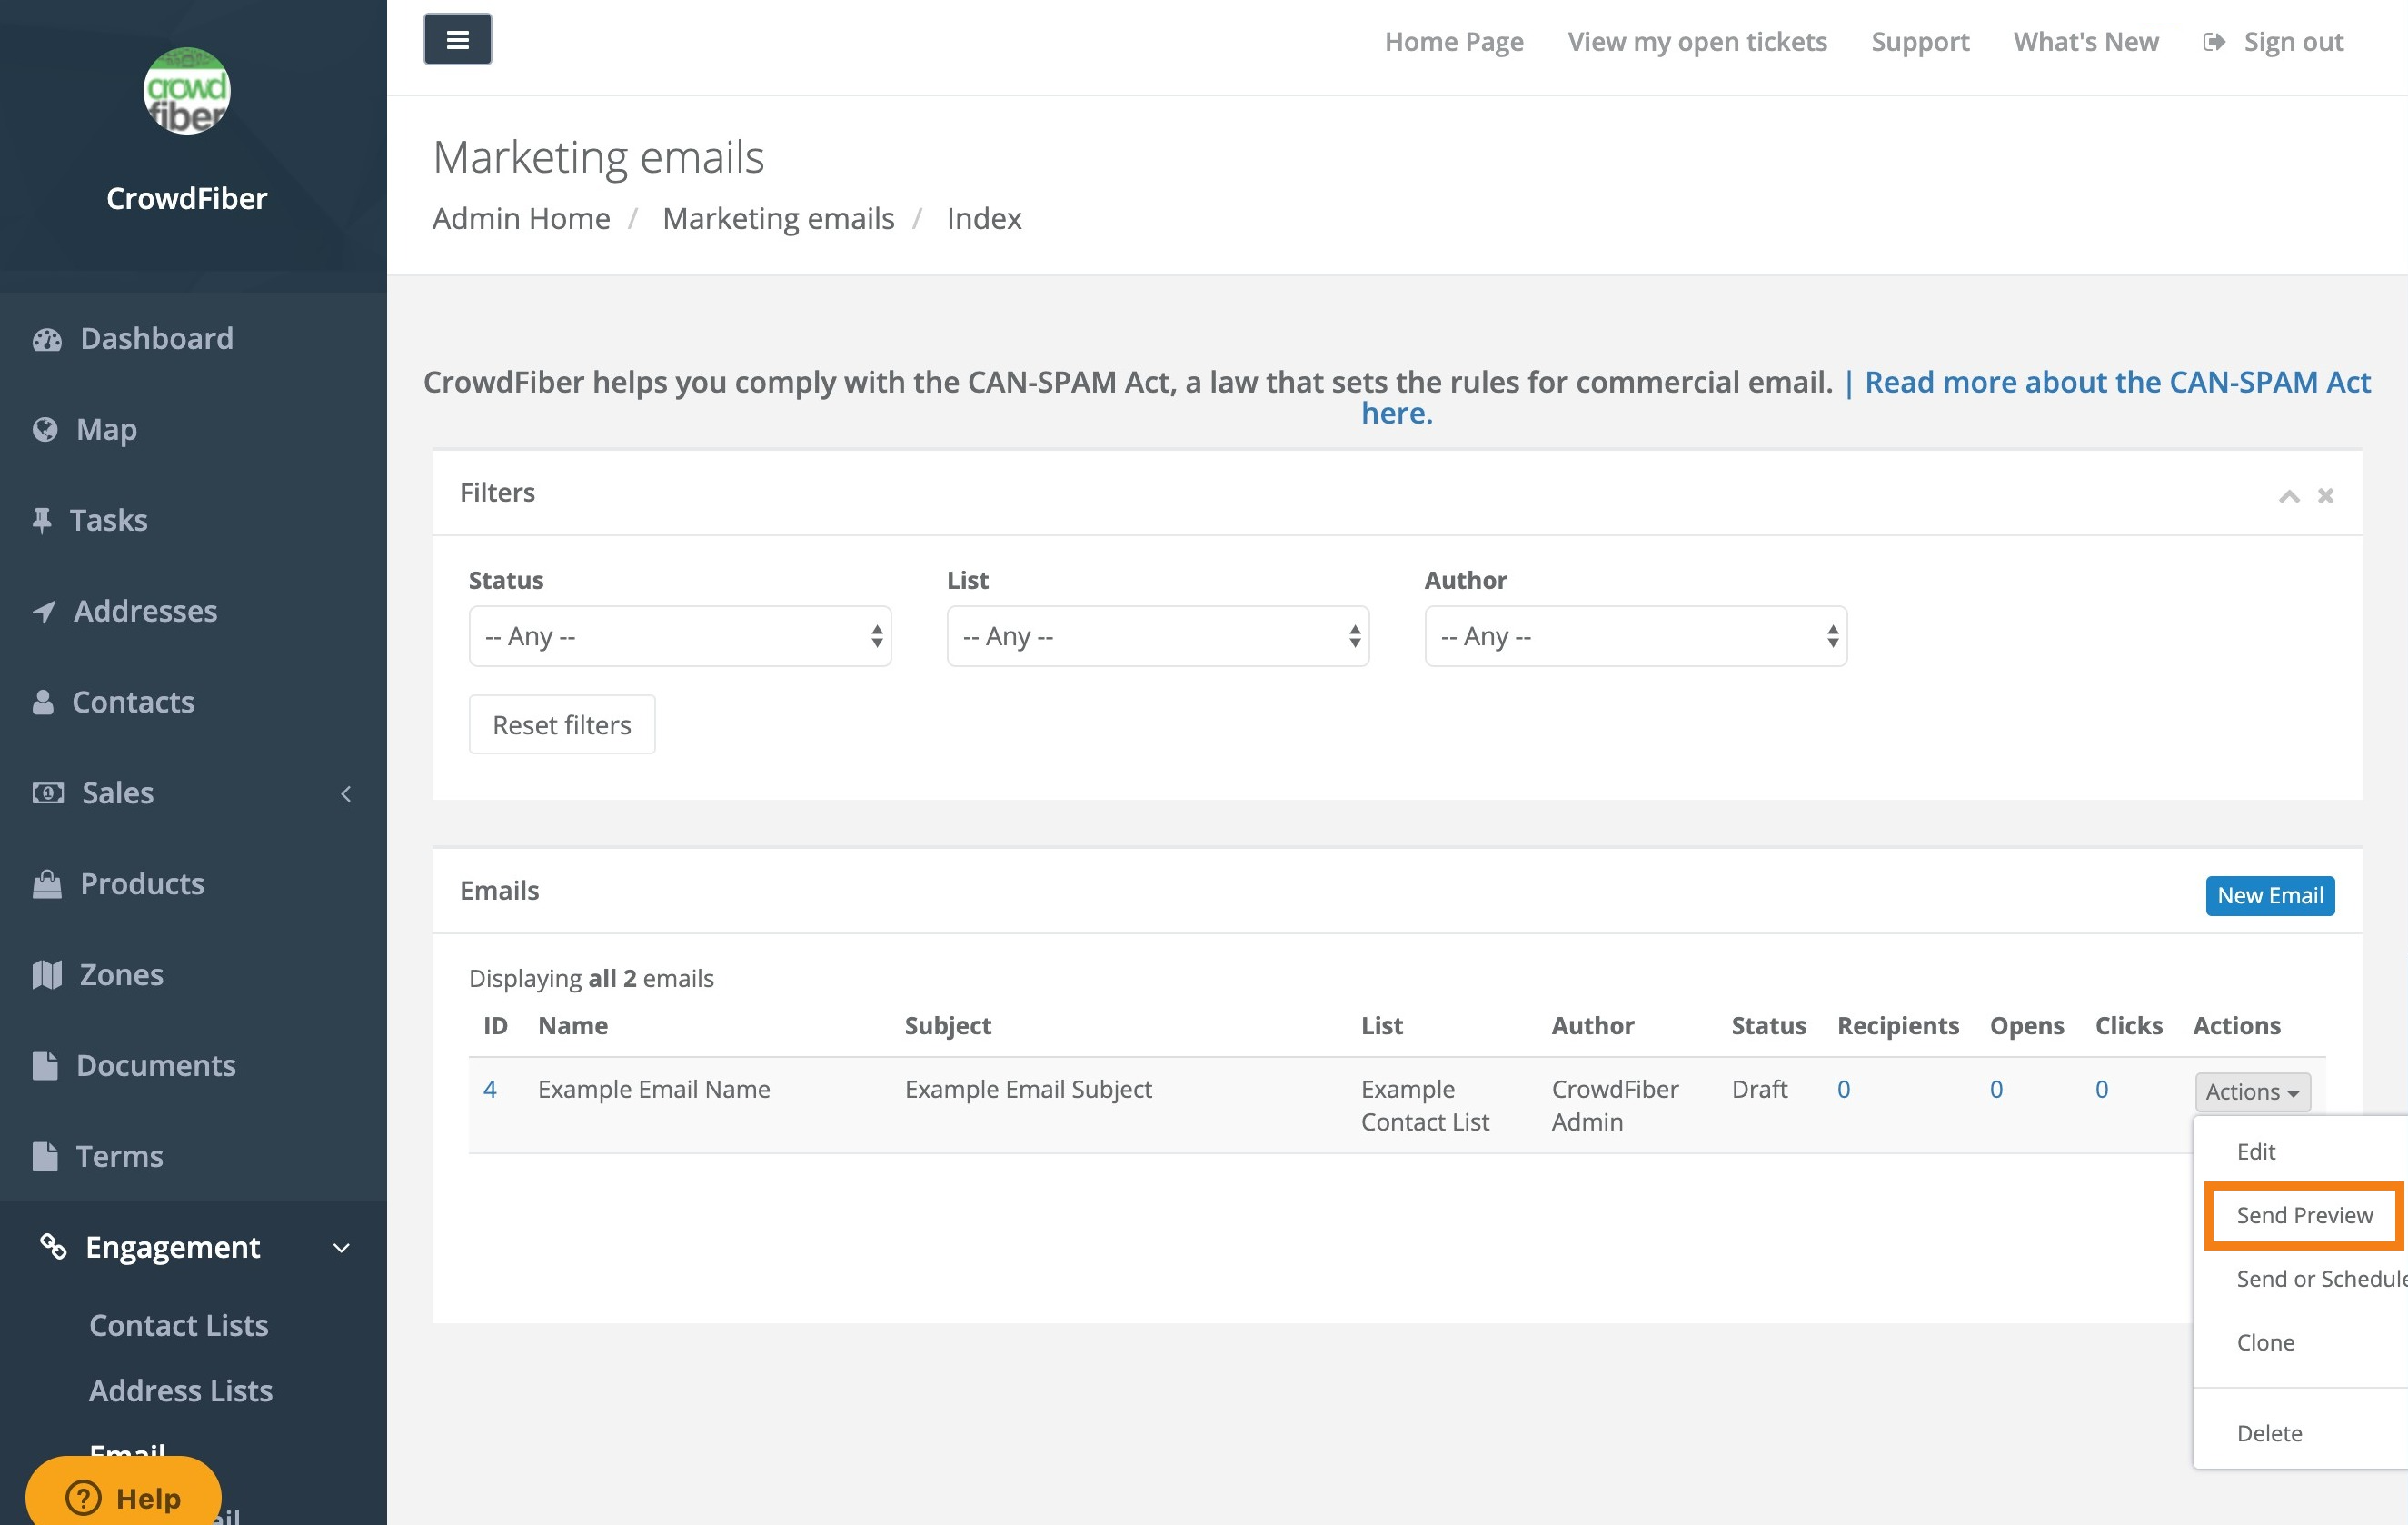
- After you save your email you'll automatically be taken back to the Marketing Emails page.
- Click the Actions button located in the far right-hand column of your index of emails.
-
Select Send Preview from the Actions drop-down menu.
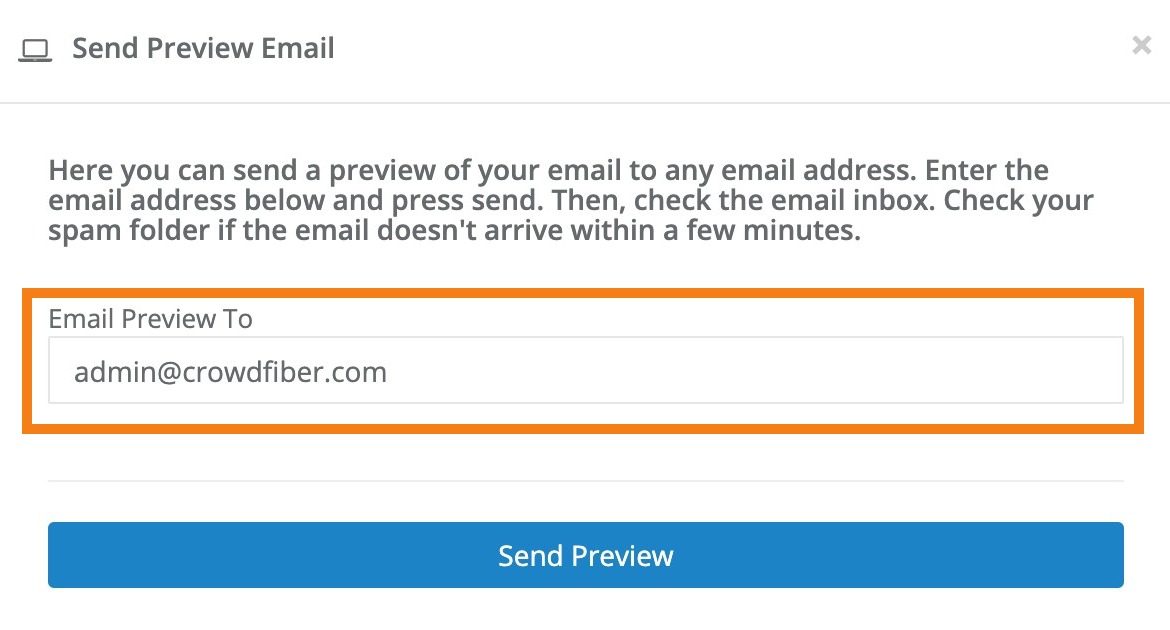
- A Send Preview Email window will popup. Enter your test email address in the Email Preview To text box.
-
Click the blue Send Preview button and your test email will appear in your test email's inbox shortly.
iv. Sending a preview with a User sign-In link
Since the User Sign-In link allows anyone who clicks the link to automatically log into a user account, User Sign-In link previews operate differently than they do in a live email (ie an email that is sent to your contact list).
To ensure that a recipient of a preview email with a User Sign-In link can never access the user account of an Admin/access to your Admin Dashboard, all User Sign-In links clicked in a preview email will log the user into the lowest-numbered user ID that exists on your site with no Roles set.
In other words, the preview will always link to the same user account, and that user account will never have access to the Admin controls of your site (if your site was created after July 15, 2020, you will be logged into a Test User account).
Site Admins can instead access the User Dashboard of any user by "becoming" that user using the Actions drop-down menu. This function will log an Admin out of their own account and automatically log them in as the other user, allowing them to experience the site in exactly the same way that the user would.
Step 5: Fine-Tune & Finalize your Email
- Review & edit After you review your preview email, continue to make improvements in the Email Editor and then send new preview emails to review your improvements. Once you're happy with the way your email displays in an inbox, it's time to move to Step 6.
Step 6: Send your Email
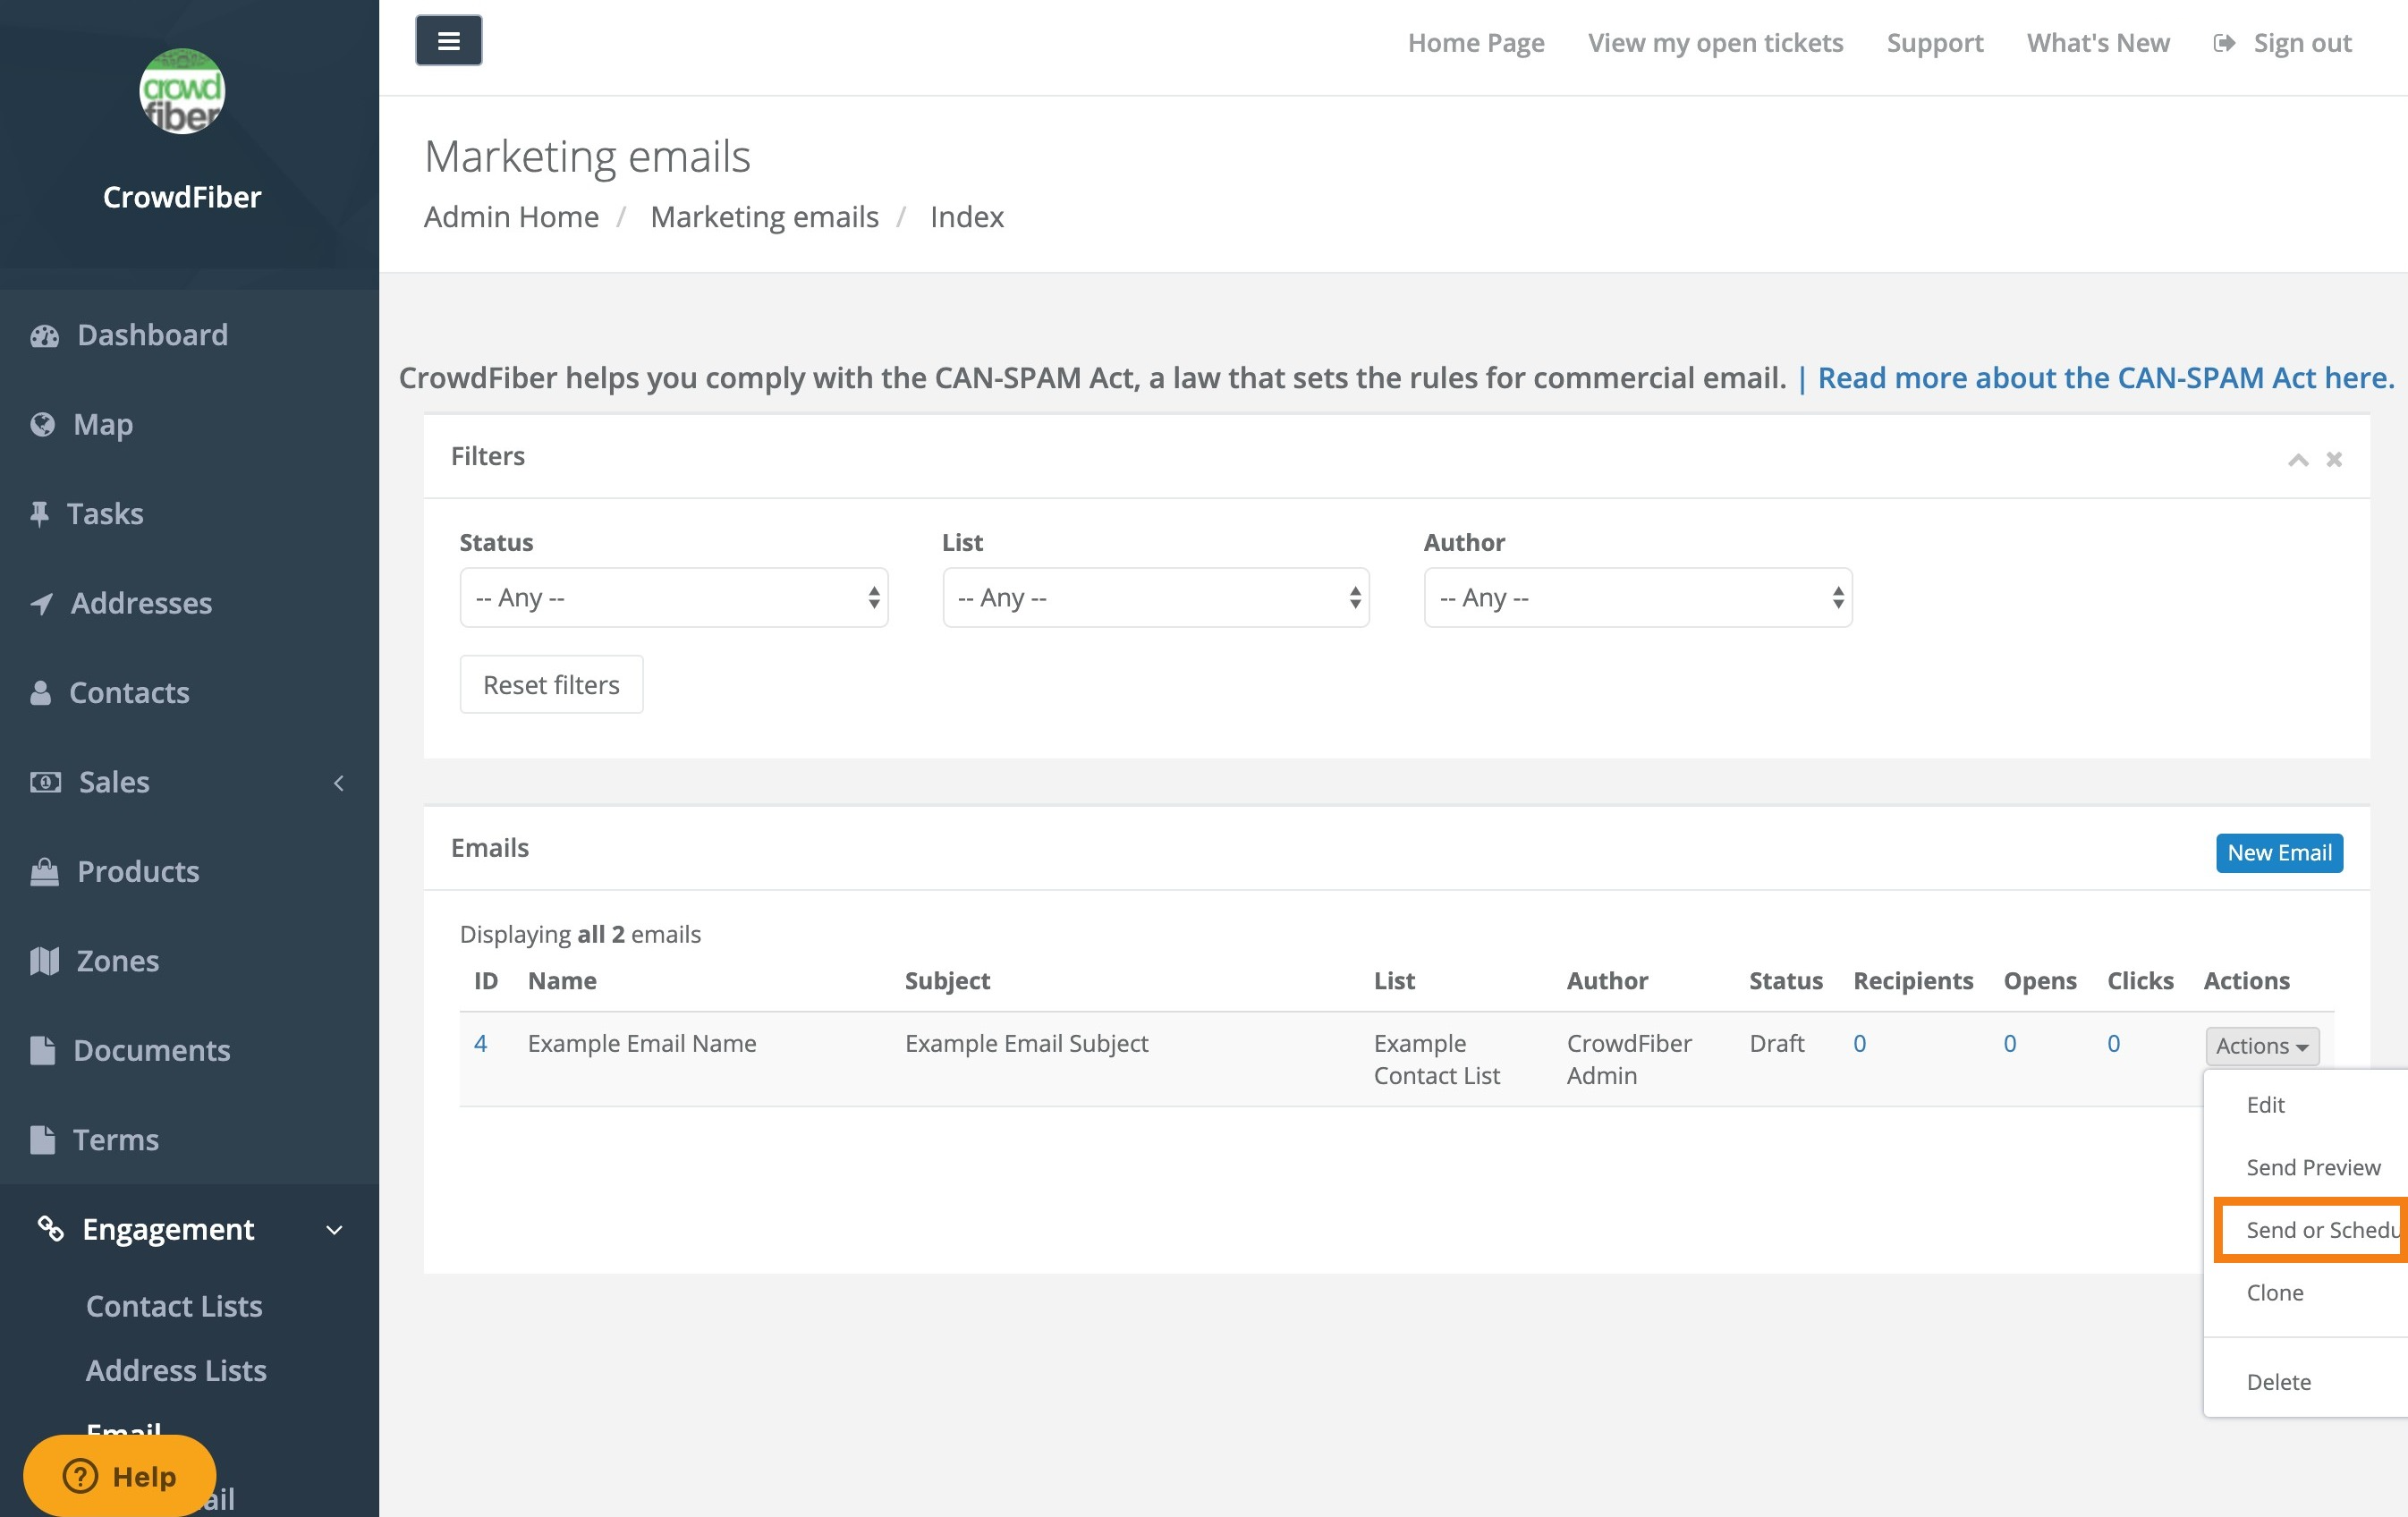
- On your Marketing Emails page (Engagement > Emails), click the Actions button located in the far right-hand column of your index of emails.
-
Select Send or Schedule from the Actions drop-down menu.
-
On the following page choose whether you'd like to immediately send your email or whether you'd like to send your email at a later date:
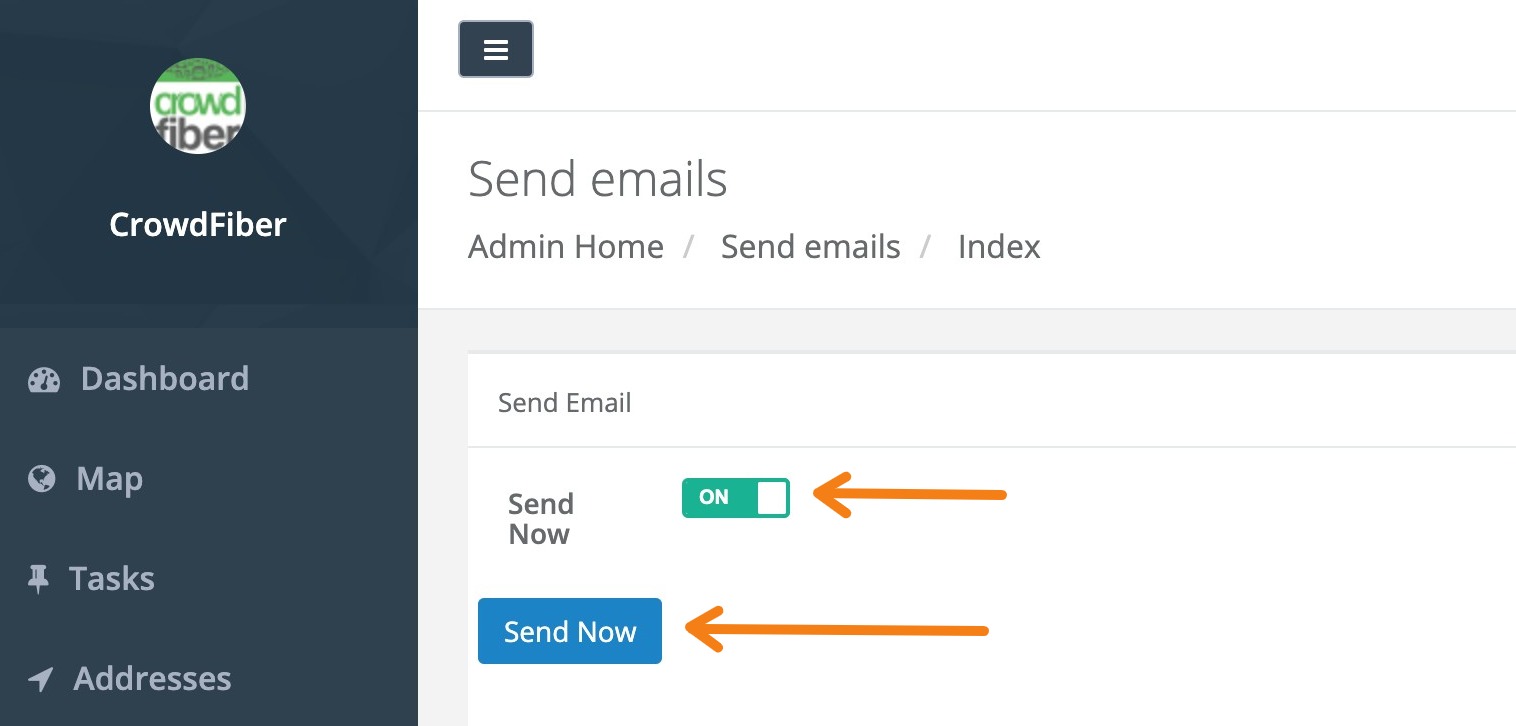
- Send Now
Click the Send Now slider to turn on the Send Now feature, then click the blue Send Now button below the slider.
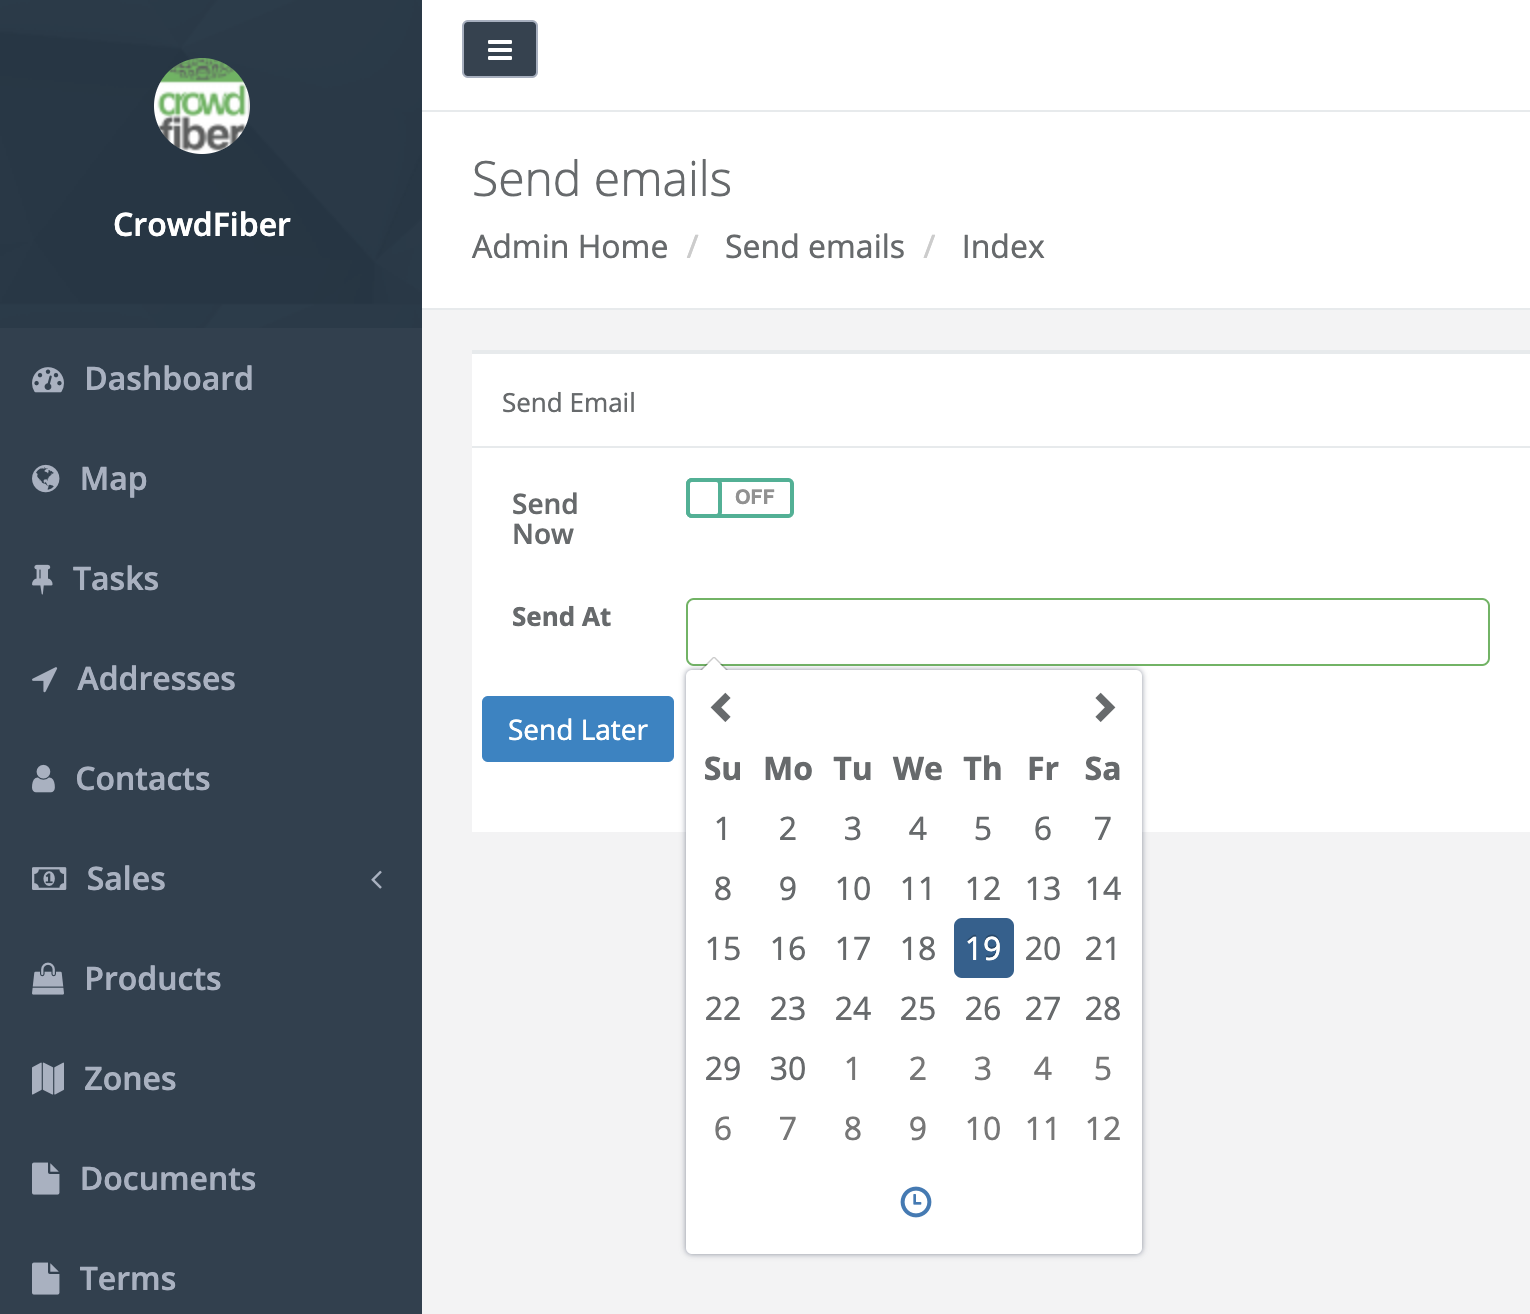
- Schedule the Delivery
Click the Send At text box to select a day to send your message, click the clock icon in the calendar to select a specific time to send your message, then click the blue Send Later button.
- Send Now
Click the Send Now slider to turn on the Send Now feature, then click the blue Send Now button below the slider.