Custom Layers: What, Why, & How
Click here for a video tutorial: local Custom Layer Loom Video link.
If you've used CrowdFiber's Admin Map or the Zone Record geometry editor, you will likely have seen the layer selector:

Selecting this menu allows you to select some of the map layers we have created for all sites to have access to. You can also add your own Custom Layers. This article will address adding your own local Custom Layer.
-
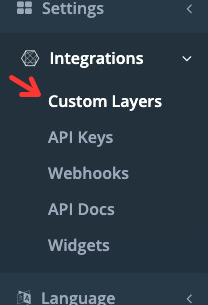
To begin, go to the Custom Layer page. You can find this by selecting Integrations and then Custom Layers in the left-hand rail:
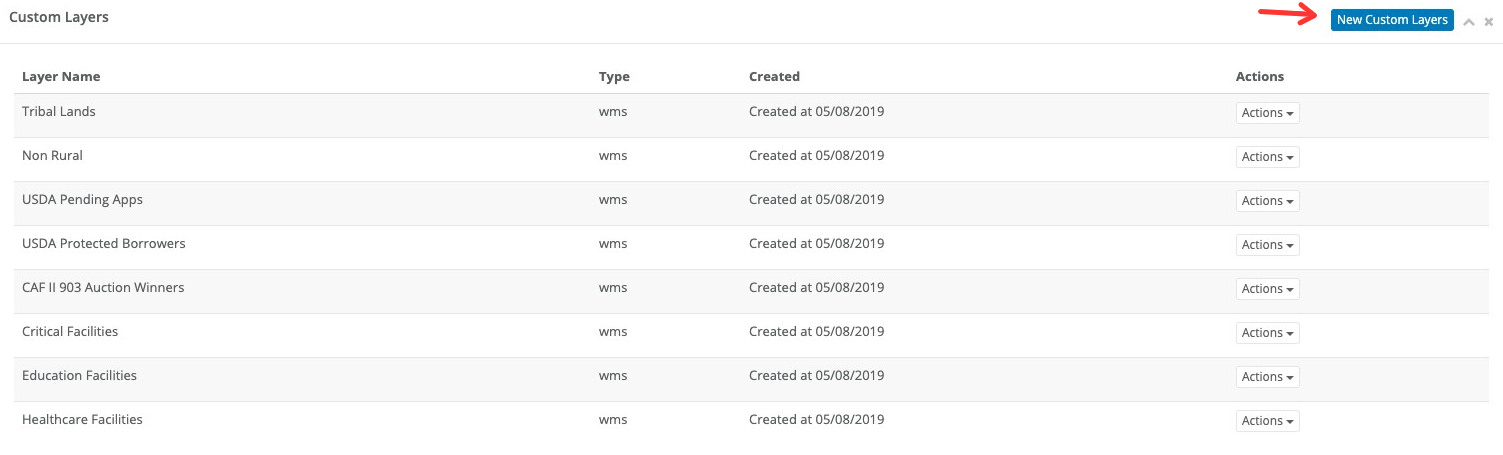
- Once on this page, you'll see the layers that are already uploaded to your system. You can use the methods defined below to edit the appearance of these layers. For now, let's skip to adding a local layer.
- Select the blue "New custom Layers" button.
You have two options in setting up Custom Layers:
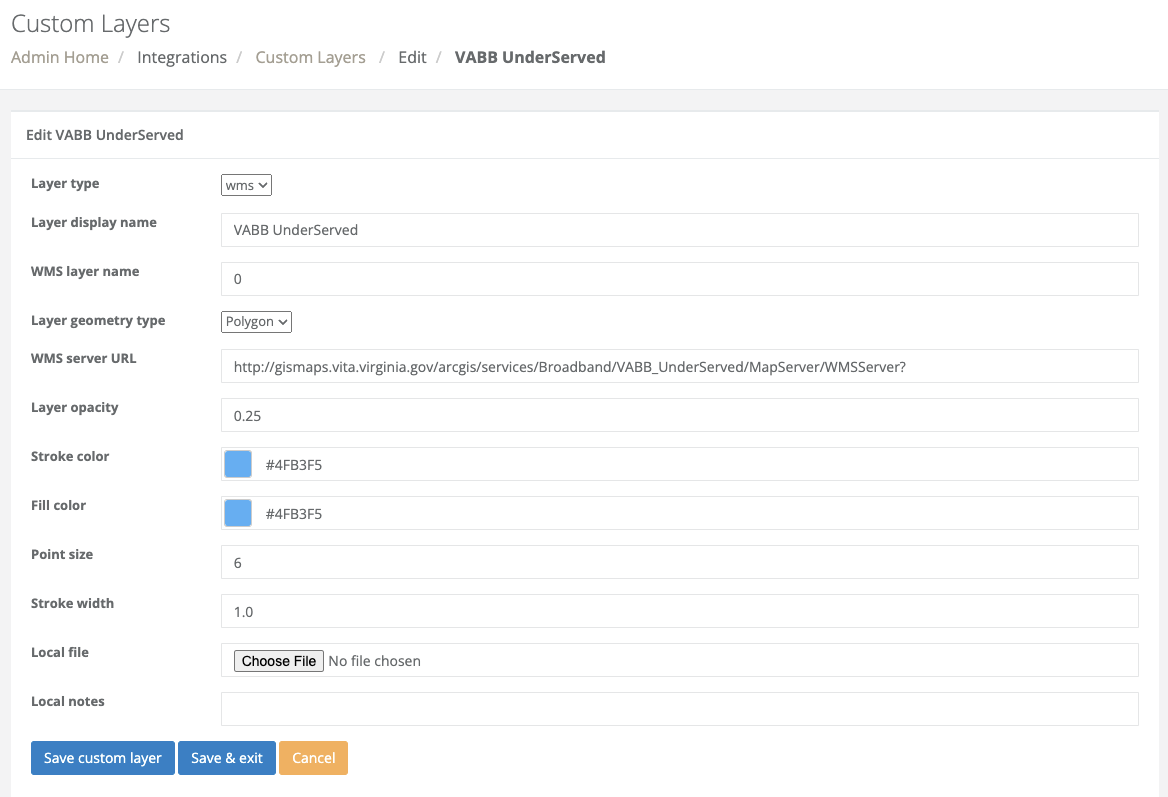
1. You can serve them from your geoserver using WMS layers or you can load a KML as a local file.
To learn more about WMS and ArcGIS, please see https://enterprise.arcgis.com/en/server/latest/publish-services/windows/tutorial-publishing-a-wms-service.htm and here is an example configured in CrowdFiber:
2. You can upload a KML.
To upload a KML, here are the steps once you click "New Custom Layers":
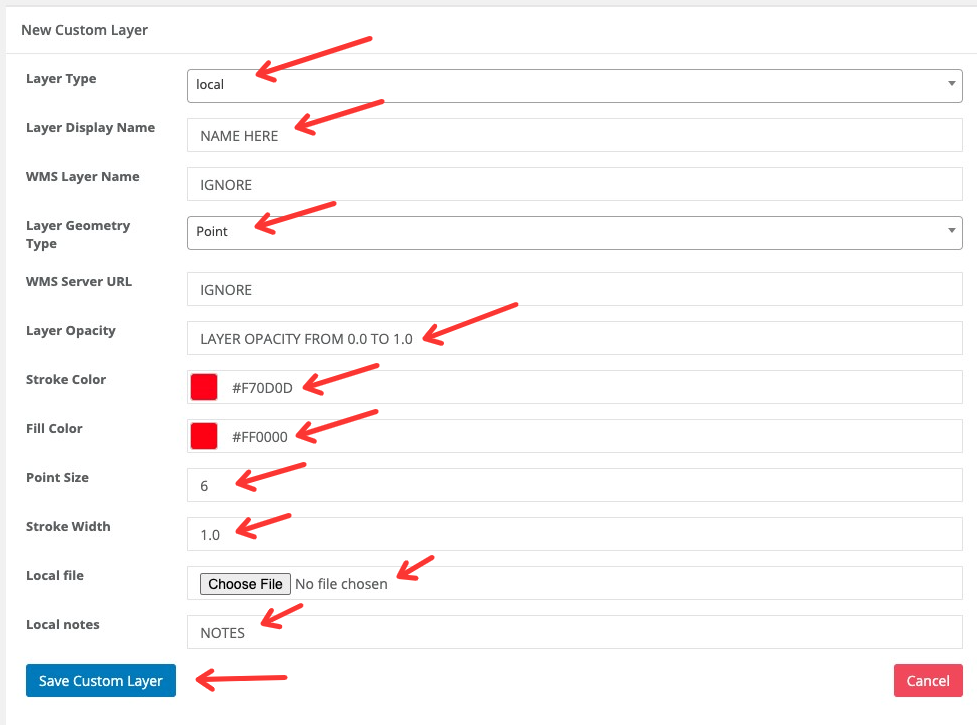
- You'll first need to change the type to "local". Below, I'll include a section on setting up a WMS connection.
- Enter the name of the layer that will show up in the menu. Keep in mind that the menu is set up to alphabetize layers.
- You'll need to select the geometry type. You can upload Points for visualizing Fixed Wireless towers, substations, etc., Linestrings for visualizing fiber routes or spans, or Polygons for visualizing service areas and other boundaries.
- You'll need to set the layer's opacity. 0.0 is invisible while 1.0 is completely filled and you won't be able to see anything underneath it.
- You'll need to select the stroke color. This does not just apply to linestrings. This will define also define the color of the outline boundary of a polygon and point.
- You'll need to select the fill color. This will affect the fill of both a point and a polygon.
- If you're uploading points, you'll need to select the point size.
- You'll next select the stroke width. Remember that strokes are on all the geometries uploaded, so this needs to be set to the desired thickness.
- Now you upload the file. Load KML files, not KMZ.
- Finally, if you want to add some notes you can add those.
- Don't forget to save your settings!
Once you've uploaded the file and made all these setting edits, you'll be able to go the Admin Map and see your local Custom Layer.